


Cart
0


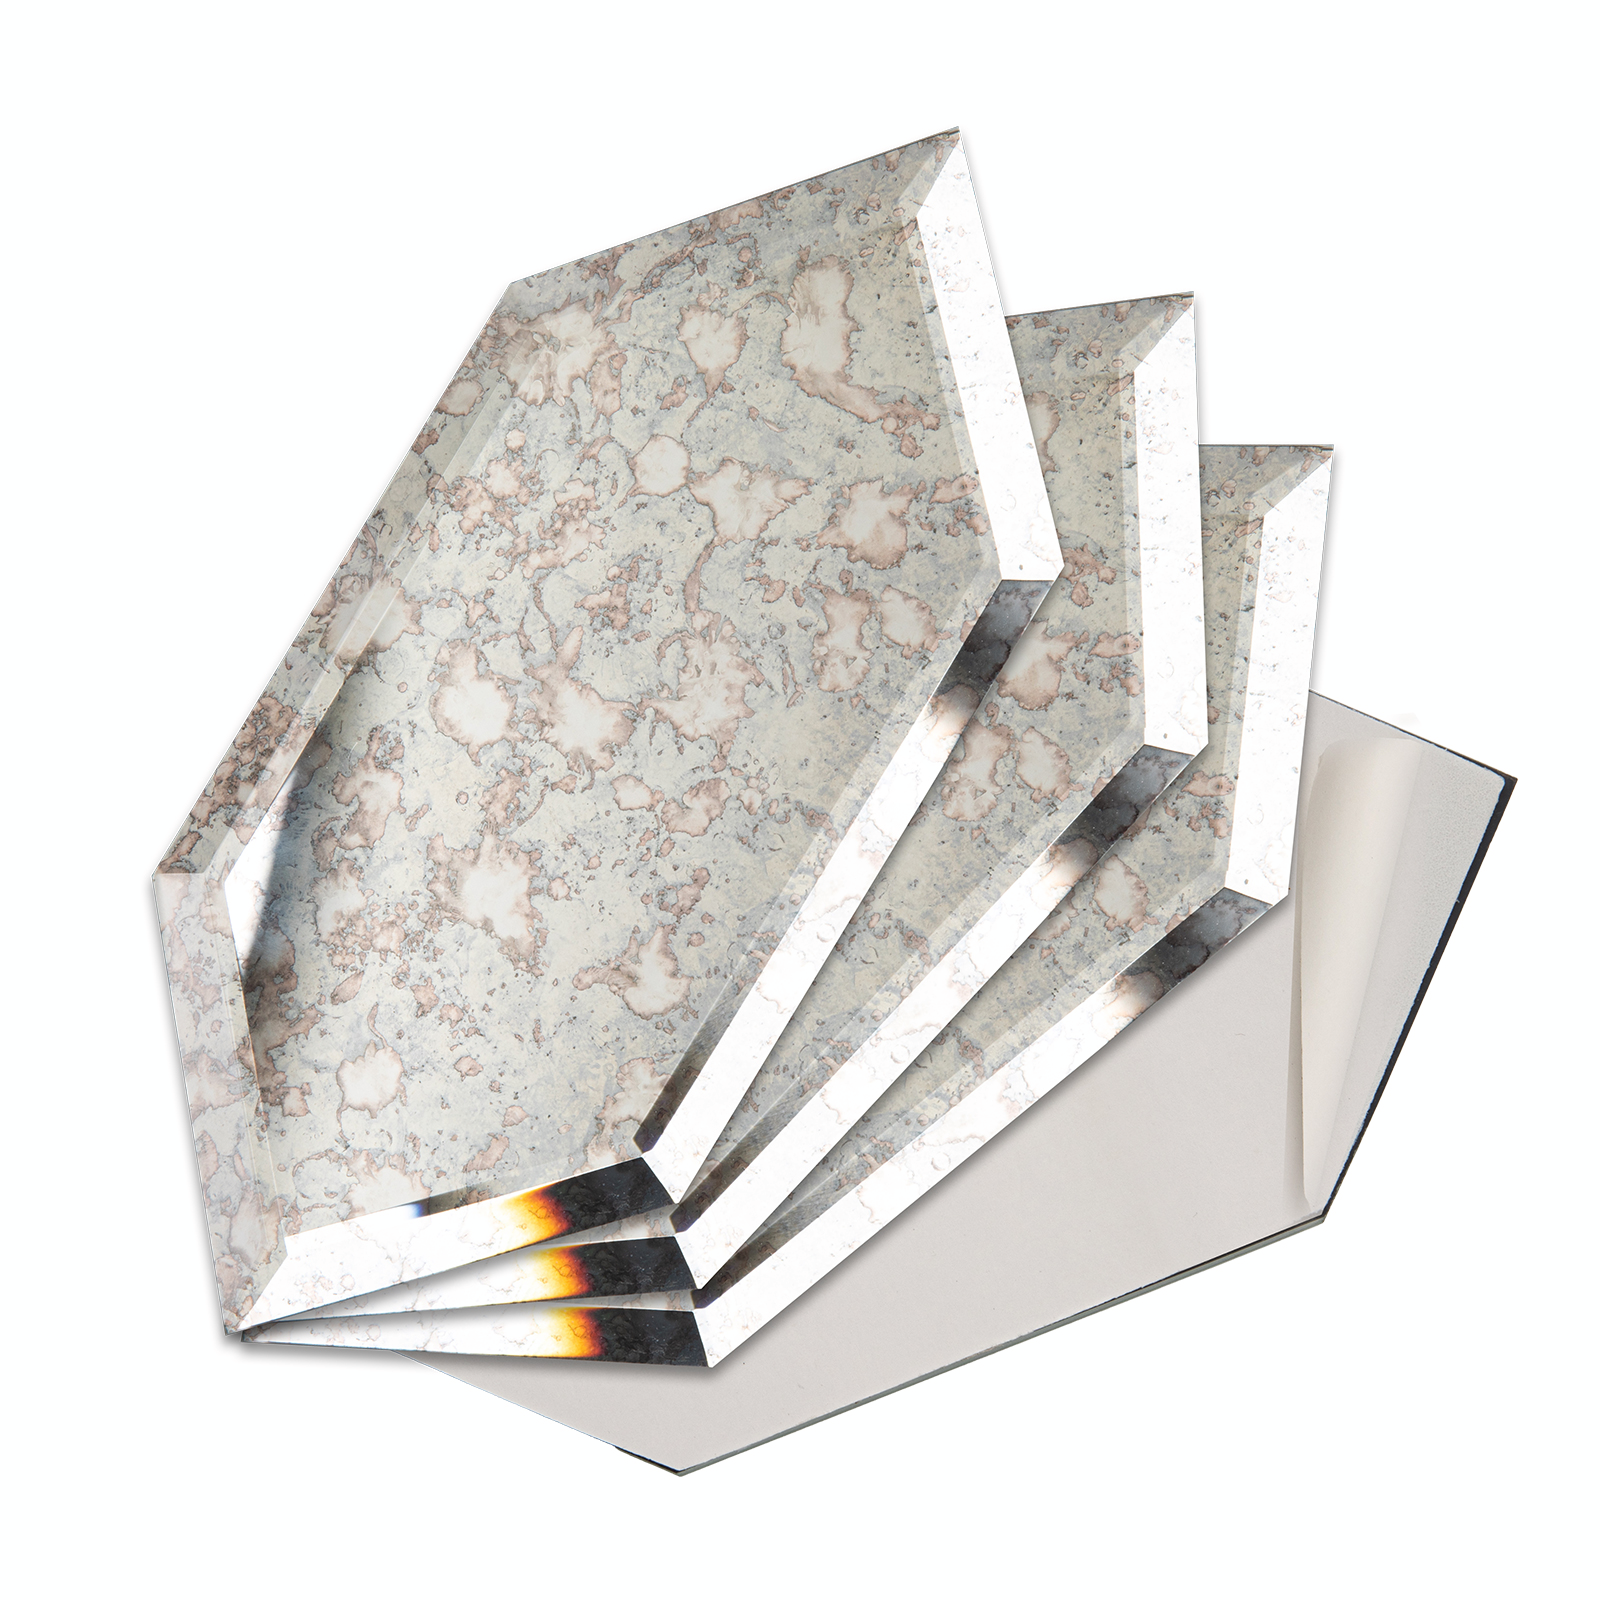
Peel and Stick Beveled Mirror Tile, Mirror Backsplash for Kitchen Bathroom Wall, 4x7.87 Inches Hexagon, Antique (30 Pcs, 4.8 SQ.FT.)
$69.99
Frequently asked questions
Will peel and stick glass tile stay stuck on a kitchen backsplash?
Yes, when the surface is properly prepared. Peel and stick tile bonds best to a clean, dry, smooth wall free of dust, grease and loose paint. Press each sheet firmly across its full surface, including edges and corners, for about 30 seconds, and avoid installing over wet areas or within 24 hours of painting. Most failures trace back to surface preparation rather than the adhesive.
How long does peel and stick tile last compared to real mosaic tile?
Traditional mosaic tile set in thin-set mortar and grout is a permanent installation and typically outlasts any adhesive-backed product. Peel and stick glass tile is made for long-term decorative use and is removable by design, which makes it the practical choice for renters and quick renovations rather than a permanent tiling job.
Can I install peel and stick tile on painted drywall?
Yes, provided the paint is fully cured for at least 24 to 48 hours, firmly adhered, and neither peeling nor glossy. Degloss glossy paint or seal it with a primer first, then wipe the wall down. Do not install directly over fresh paint, textured finishes, or paint that lifts when you press tape to it.
Can I remove the tile later without damaging the wall?
The tile is removable by design, which is why it is widely used in rentals and temporary kitchens. Warm the surface gently with a hair dryer, work a plastic scraper under one corner, and peel slowly at a low angle. Any residue is best cleaned with a mild adhesive remover.
Do I need a wet saw or grout to install glass subway tile?
No. Self-adhesive glass subway tile is cut to size with a utility knife, scored on the face and snapped over a straight edge, or with tile nippers for outlet cutouts. There is no mortar and no grout line to fill, because the sheets butt together with the grout line built into the mesh backing.
Is this tile suitable for a bathroom, a shower wall, or behind a stove?
Adhesive-backed glass tile performs best on kitchen backsplashes, feature walls, laundry rooms and powder-room walls, where splashes are occasional rather than continuous. For areas with continuous water exposure, such as inside a shower, or for installation close to a heat source, review the specifications on the product page before ordering.
How much tile do I need for a standard kitchen backsplash?
Measure length times height in inches, divide by 144 to get square feet, subtract about 10 percent for outlets and windows, then add 10 to 15 percent for cuts. A typical 12 ft by 18 in backsplash is roughly 13.5 square feet, so plan for about 15 to 16 square feet of coverage.
Is it worth buying tile from a specialty store instead of a marketplace listing?
Marketplaces win on price and delivery speed. A specialty tile store wins on product consistency, installation support, and being able to answer how the tile performs in a specific room. For a small area where finish matching across packs matters, buying direct gives you a single production lot and direct support.
How to install peel and stick glass subway tile on a painted wall
- Prepare the wall. Clean with a degreaser and let it dry fully. Confirm the paint is cured and firmly bonded, and degloss glossy paint before installing.
- Plan the layout. Mark a level line at the bottom of the tiled area. Dry-fit the first sheet and decide where partial tiles will fall.
- Cut the tile. Score the face with a utility knife against a straight edge and snap, or use tile nippers for outlets and switches.
- Peel and position. Remove the backing a few inches at a time, align to your level line, and press from the centre outward.
- Press and finish. Press firmly across the whole sheet, paying extra attention to edges and corners.

Size: 4 x 6 x 0.2 Inch (100 x 150 x 5mm), 30 sheets/box, totally 4.8 SQ.FT.
EASY TO APPLY: Peel and stick, these beveled antique glass mirror tile backsplashes have a self-adhesive backing so no glue is required
STYLE: The beveled edges highlight the beautiful vintage, misty, smoky mirrors. This silver-toned wall tile makes for a perfect addition to any shabby chic or Victorian design project
APPLICATION: Its unique finish and beveled edge give a vintage touch to any of your interior projects. Mirror glass tile could be used for the bedroom, living room, dressing room, kitchen, etc
ATTENTION: Mirrors arrive packaged in a thick padded box to ensure safe arrival and easy storage until needed


